Learning should be engaging and interesting. Unfortunately, taking notes is boring, lapbooks are time consuming, and printed information is easy to ignore. How can we capture kids’ imagination while at the same time making sure that they remain focused on their lessons? Interactive notebooks have been working for my family.
Why use interactive notebooks in your homeschool?
Kids learn best when we engage them using more than one modality. Interactive notebooks are a great way to do this.
- Visual – Children learn what they can see. Drawing, graphing, and coloring maps allows them to visualize their lessons. Underlining, circling, and otherwise marking up what they read reinforces the words, helping them to process the information efficiently.
- Auditory – Listening to lessons (or to books being read aloud) is a great way to gather information. By keeping fingers busy during lessons, we are able to capture more of our students’ time and attention.
- Kinesthetic – For kids, doing is knowing. Tracing, folding, and manipulating information allows for greater retention. It makes learning fun, and who doesn’t want to have more fun?
What exactly are interactive notebooks?
Interactive notebooks are a combination of teacher provided information and various types of writing and graphic techniques that the kids use for taking notes. They encourage organization, making connections, and creativity.
Interactive notebooks are a logical extention of notebooking and lapbooking, but credit for the idea is generally given to TCI, creator of History Alive! materials. The basic set-up is this:
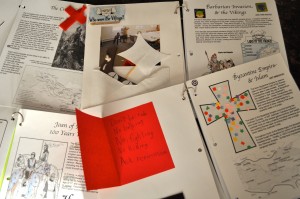
- Right side / teacher input – This is where I place a brief review of the day’s lesson, provide images, maps, timelines, and any other information that I wish to impart. The kids mark this up as we discuss the material.

- Left side/ student output – This is where my students are given freedom to re-organize information in a way that works for them. I often provide an idea to get the process started, but try to be flexible (their ideas are often better than mine). Examples include annotated illustrations, lapbook elements, or a creative writing project.

How did you start using homeschool interactive notebooks?
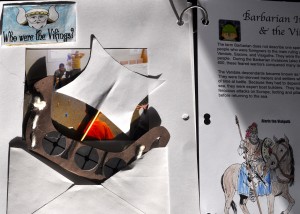
I am a great lover of the creativity fostered by lapbooking and notebooking, but to make lapbooks work for our crew I needed to let go of 2 of the basic tenants of lapbooks, the file folders and the millions of little pieces. Lapbooks are messy to create, hard to store, and don’t allow for large quantities of writing. Instead we use 3-hole punched card stock because it is stiff enough to hold up to heavy interactive elements like shrinky-dink stained glass, and able to be easily run through the printer.
More importantly, I needed to make sure that the fun crafts didn’t take priority over learning. By providing my own summary for them to highlight, maps investigate, timelines to fill in etc. I was able to ensure that everyone received the same information, and that they could easily see it while I was speaking.
I also needed to figure out how to balance the fun and learning elements within our time constraints at co-op. I found that giving the kids a place to focus their energy kept them attentive.
How do you prepare homeschool interactive notebooks?
I spend a short amount of time before class creating base pages (out of the card-stock I mentioned above) printed with basic maps, images, and a short summary of that day’s lesson. At home with my own students, I sometimes give them either vocabulary or graphic organizers so that they can write the summary themselves, but that isn’t possible with the age group that I work with in our co-op setting.
 Then the fun begins. Equipped with glue sticks, colored pencils, paper and stickers, we begin to interact with what we have learned. Sometimes our creativity requires little preparation other than providing writing paper. At other times we add fabric scraps, metal embossing, folded lapbook elements, drawings, or photographs of our 3d projects.
To avoid chaos I am choosy about which lapbook elements we will use, and I have them pre-cut and ready to go when we get to the appropriate section. I am also careful to avoid handing out more than one element at a time. Students complete and glue mini books into the notebook immediately. (Storing multiple elements in pockets is a recipe for mix-ups and losses.)
Where can I find more resources to make my own interactive notebooks?
This is not a unique idea, so google interactive notebooks and have fun browsing.
My favorite sites:
- Mrs. Gagnon has some great posts about how to get started
- Mr. Roughton posted lots of ideas for simple interactive assignments that don’t require much teacher preparation.
- HomeSchoolShare and Currclick have a wealth of lapbook and notebook elements.
- Donna Young is famous for her printables. My favorite are her timeline forms and calendars.
Creativity is important to me, and I want my kids’ school experience to reflect that. Basically, in our notebooks we take the best of lapbooks, handouts, crafts, and note taking, and combine them. I love that interactive notebooks have space for prepared teacher input, and student output to be displayed as they illustrate or respond to the information in their lessons.
Sounds fun right? Give it a try!


I don’t have any kids yet, but I LOVE this idea! (And honestly, I want an excuse to make one for myself! ;) )
Go ahead! I’m a big fan of crafty notebooks for adults too. Take a look: http://www.libertyhillhouse.com/2013/01/02/artistic-journaling/
Pingback: Where to find Five In A Row Resources - Liberty Hill House